Have you ever wished you could use your work-related talents to do something creative and fun of your own? That is precisely what I did when looking for a new challenge. Over the course of 7 months, I built a magnificent mini house!
My day job has me designing beautiful home interiors and offices for my clients. For this task, I was builder, designer, and client all rolled into one. Elaine Shaw of MIAIMminiatures has been bringing mini houses back into fashion. These are not doll houses for children, but spectacular design pieces for your home that you can fill with high-end furnishings.
Building the Mini House Task
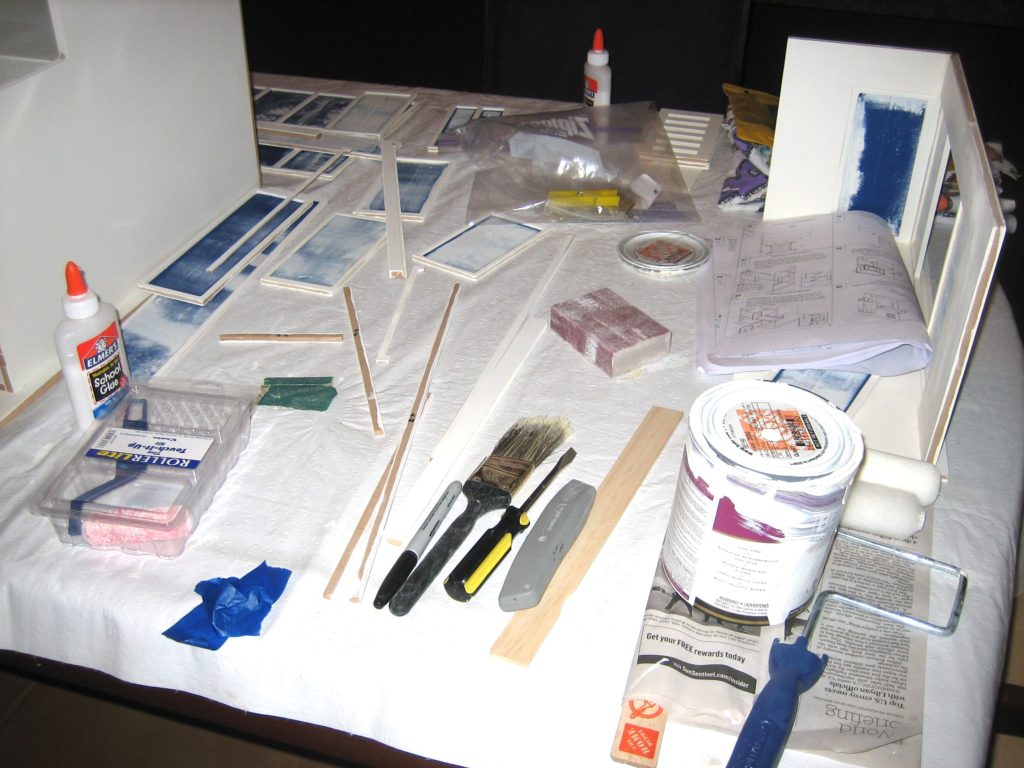
Step one – opening the box and finding an astounding number of pieces for my mini house.
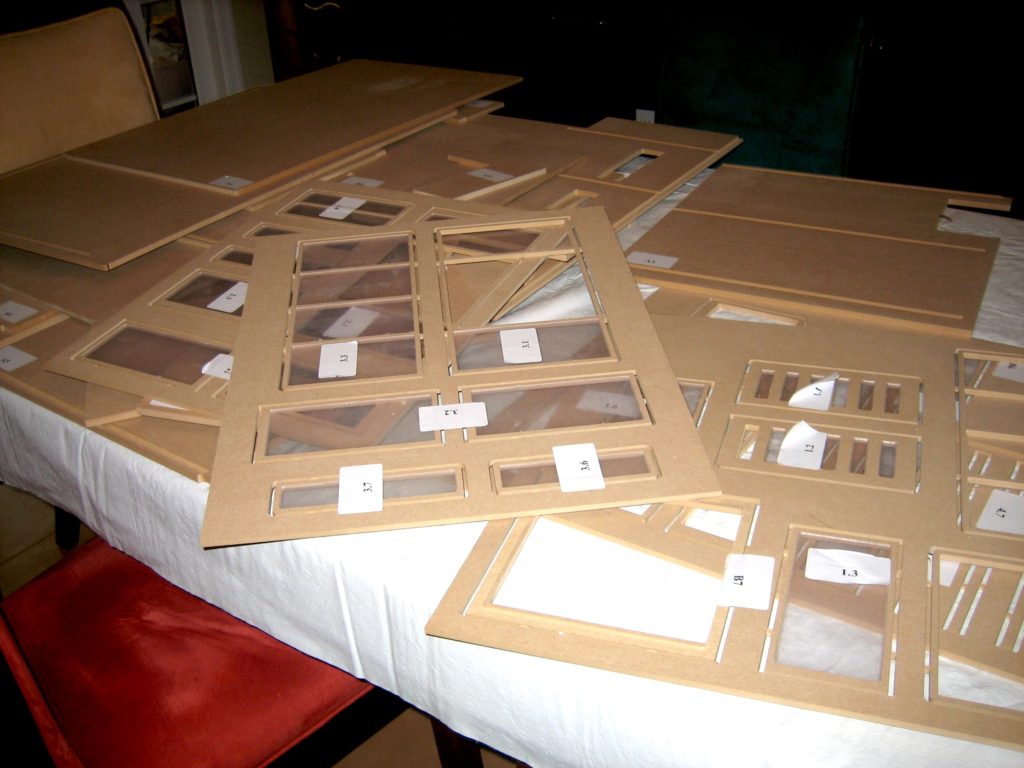
I could not wait to get started with the painting and assembly.
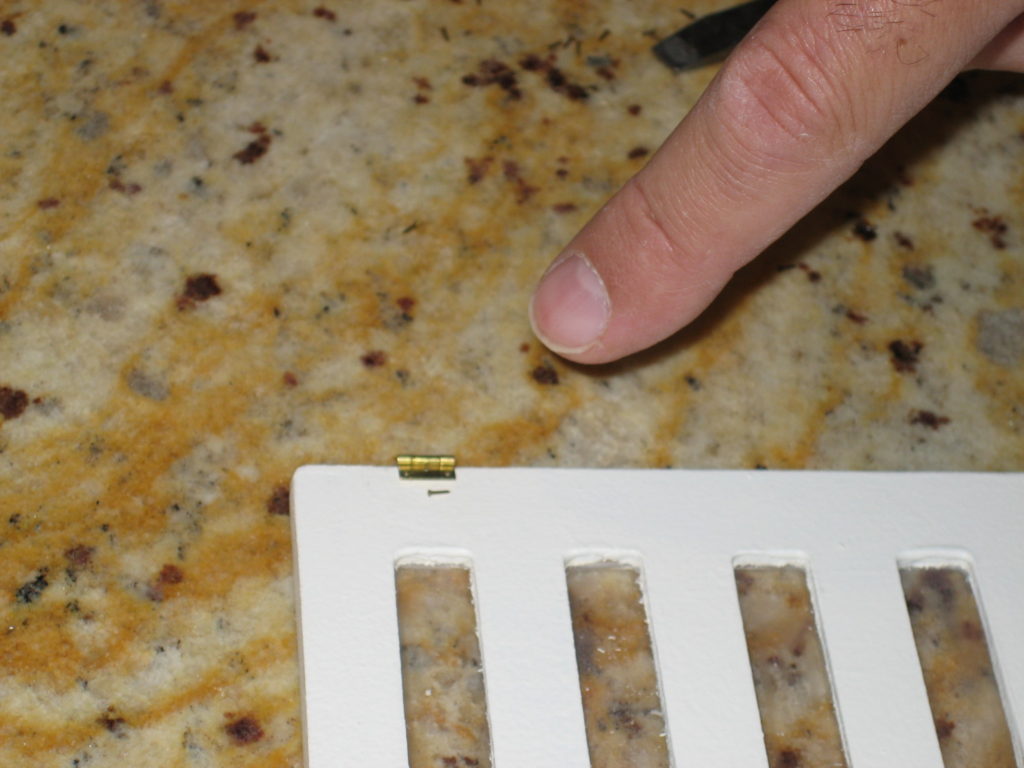
Because this is a mini house, to say the hardware was small would be an understatement. You can see in the photo below just how tiny the hinges and nails were.
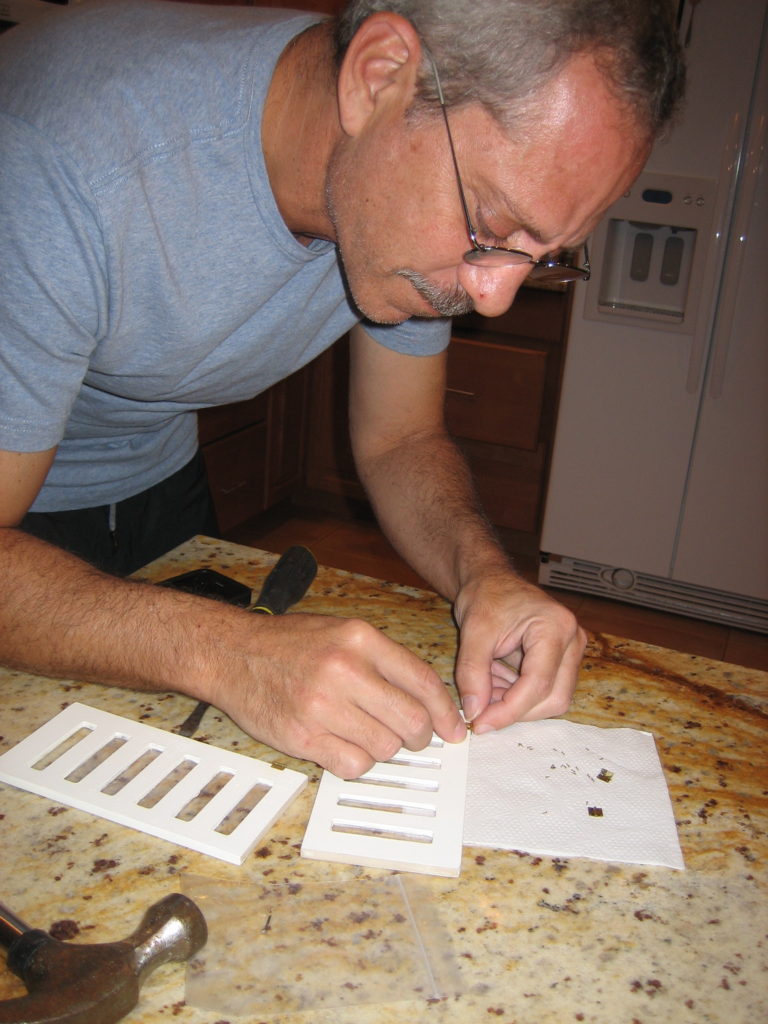
Although this project was my baby, my husband joined in the fun and helped fit the pieces together. It was like a puzzle, and I was glad he was there to apply all the tiny hinges and nails.
Of course, he never worked on it without me there. I was a bit possessive and obsessive during the process.
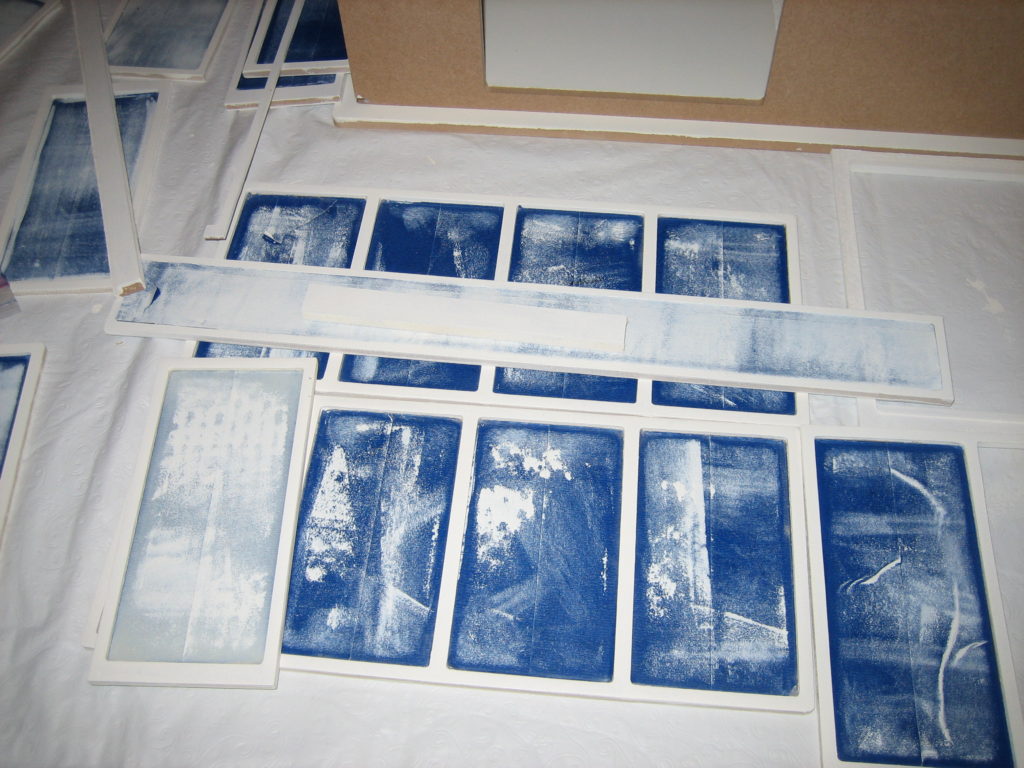
The most frustrating parts of the project came during the build. Because the plexiglass windows were preinstalled in the frame, it required great care to paint around the edges. That was a tedious and time-consuming process.
The other frustration was the nails. Each one was the size of an ant, and I am truly glad my husband was there to accomplish that part.
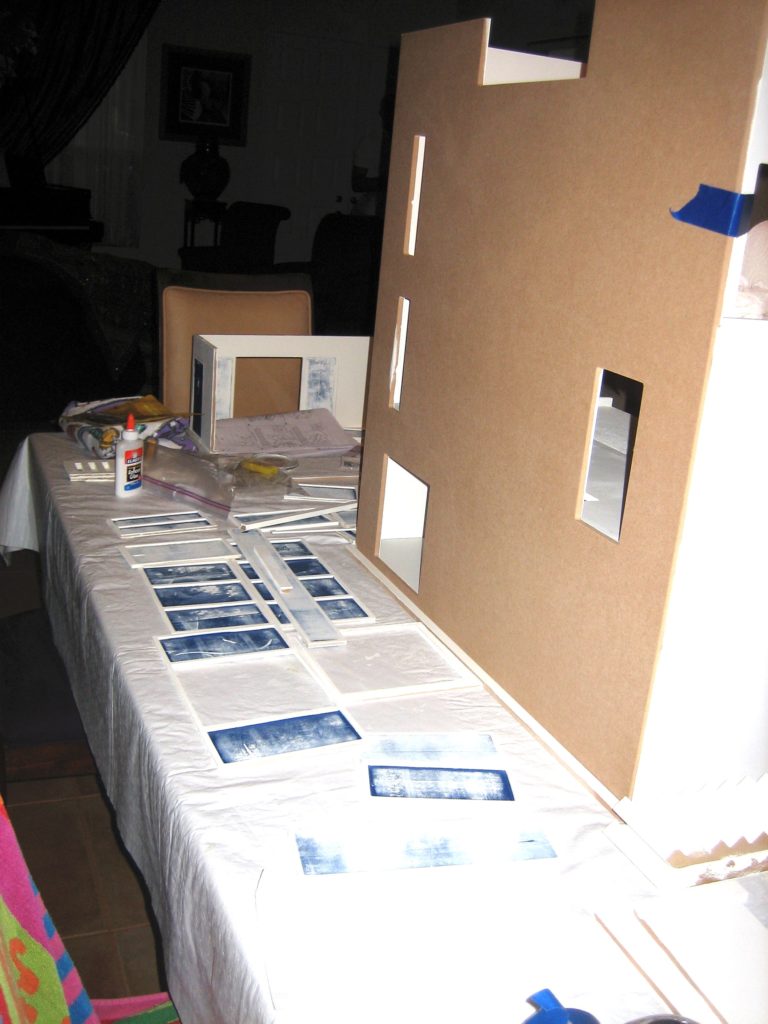
The photo below shows the building coming together nicely. I spent about 2 to 4 hours, an average of three times a week working on my mini house over the course of seven months.
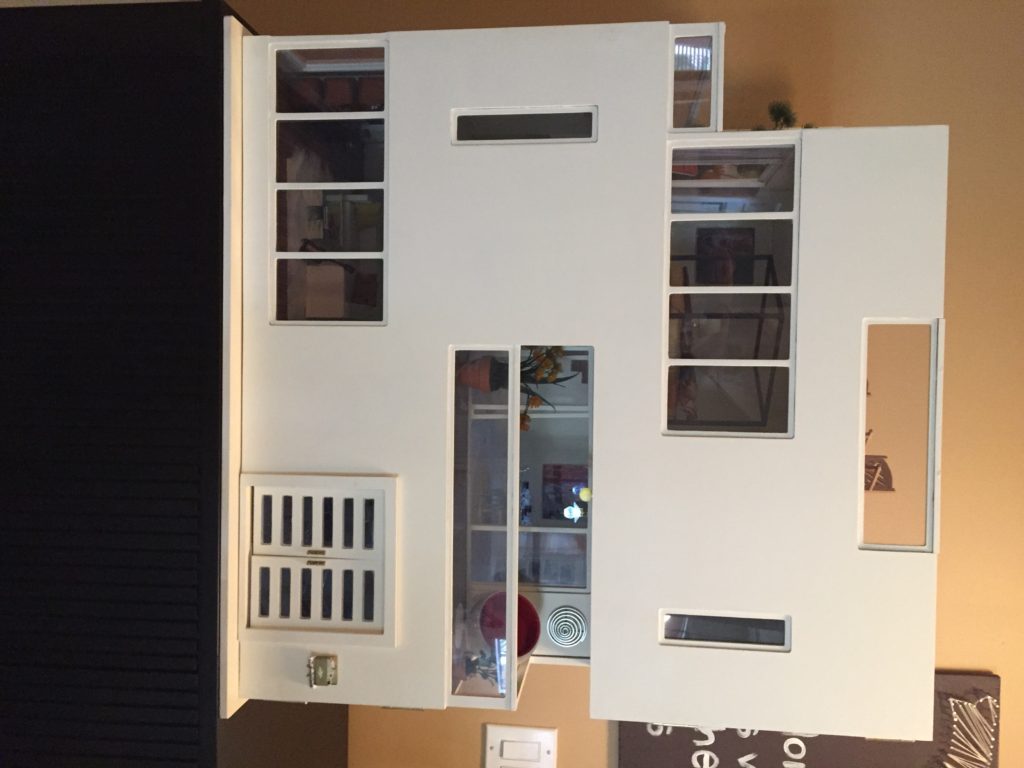
Putting the house together and seeing it take shape was exciting, especially after the details of painting the windows and the sides of the wall. It actually looks like a house.

Designing the Interior of My Mini House
After finishing the frame, the creative part of furnishing the interior could begin. Some of the furnishings were purchased, with most of them coming from PRD Miniatures. I had fun making all the wall art, plants, rugs, bedding, mirror furniture, rooftop grass, and brick pattern you will see in the photos below.
Because this was a modern home, the mini scaled contemporary furnishings cost almost as real ones. I purchased what I could and improvised the rest to create the accessories.
Laying down the wood flooring was very satisfying, as I had to install it one wood plank at a time. It was quite the test keeping everything straight when working with such small pieces.
The Finishing Touches – Decorating My Mini House
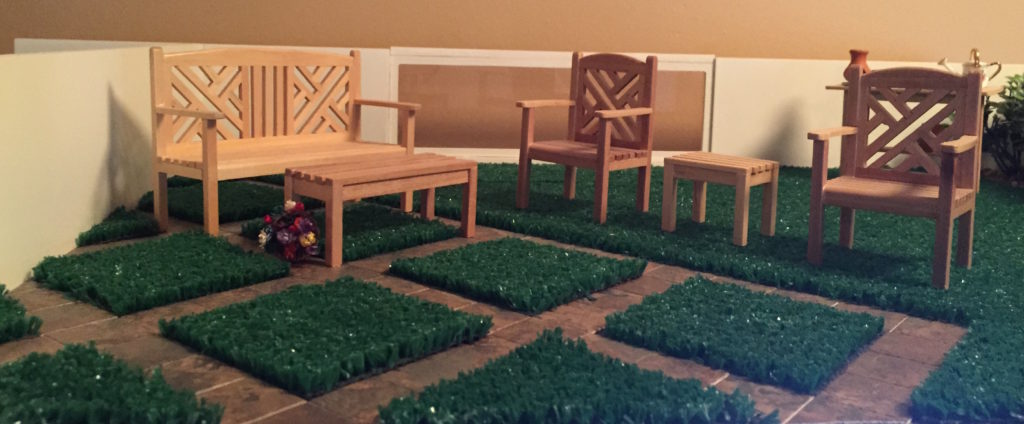
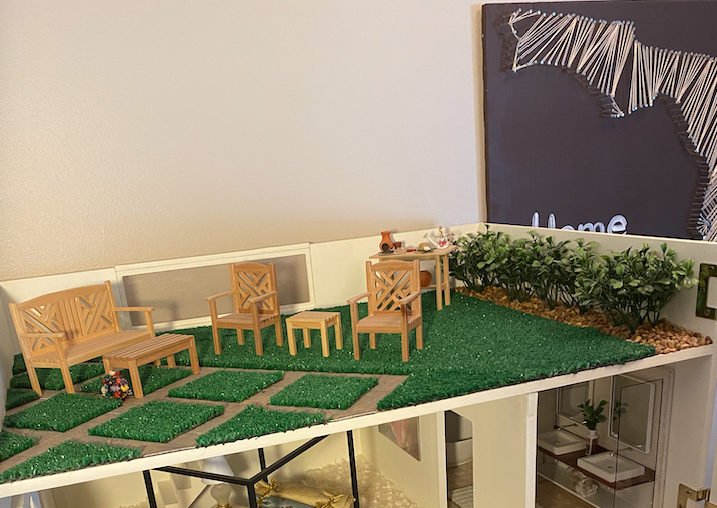
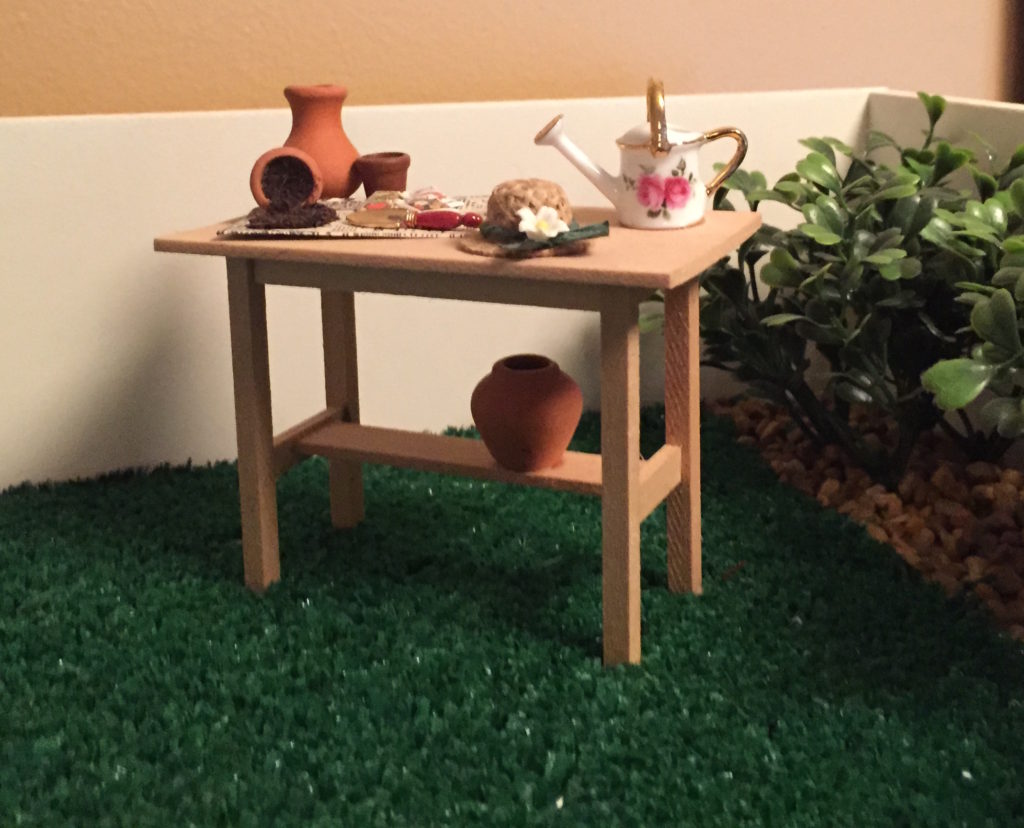
Starting at the top, everyone should have a rooftop garden. I had fun making the grass, plants, and brick pattern around the seating area.
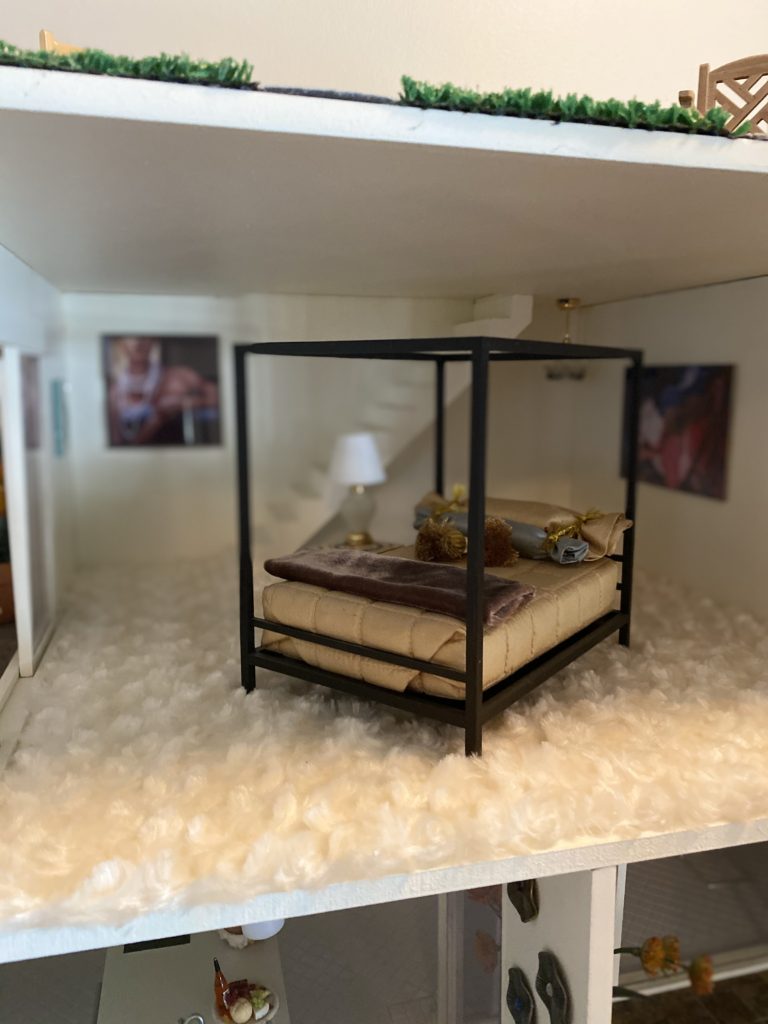
Master Bedroom and Bathroom
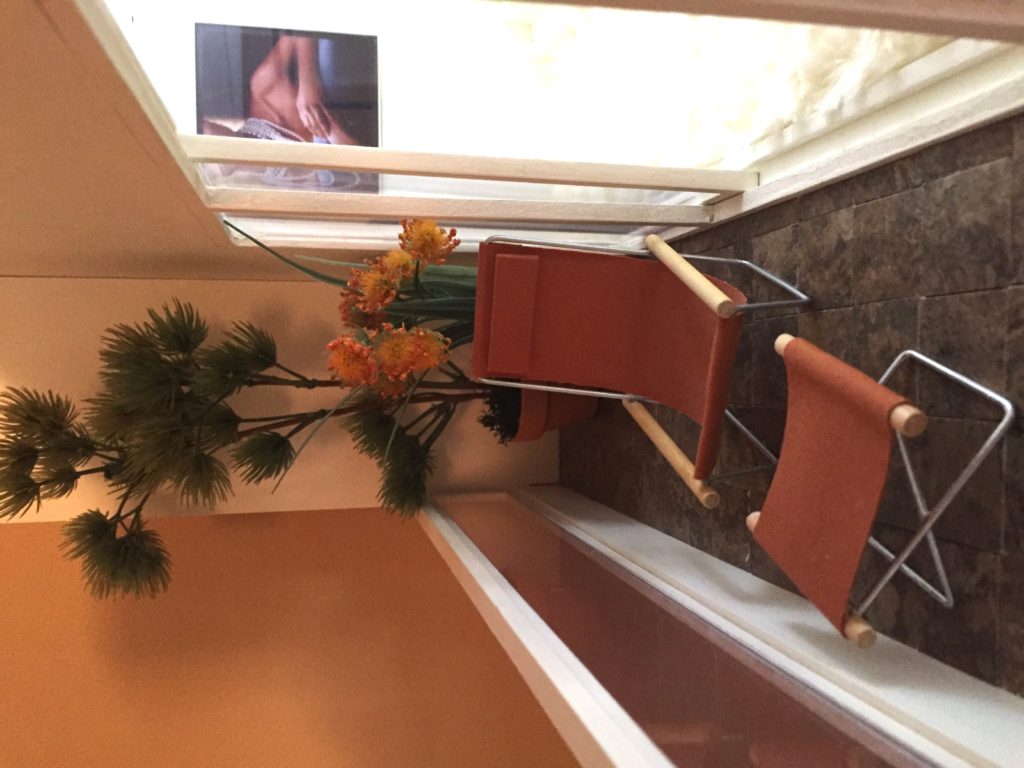
One level down, we find the owner’s suite. Outside the bedroom is a terrace with a mini terra cotta pot. I used small scale floral as a tree.
The bed is made from old fabric samples. The wall to wall carpet is faux fur used for crafts or sewing projects. I used photos inside lucite frames for the wall art.
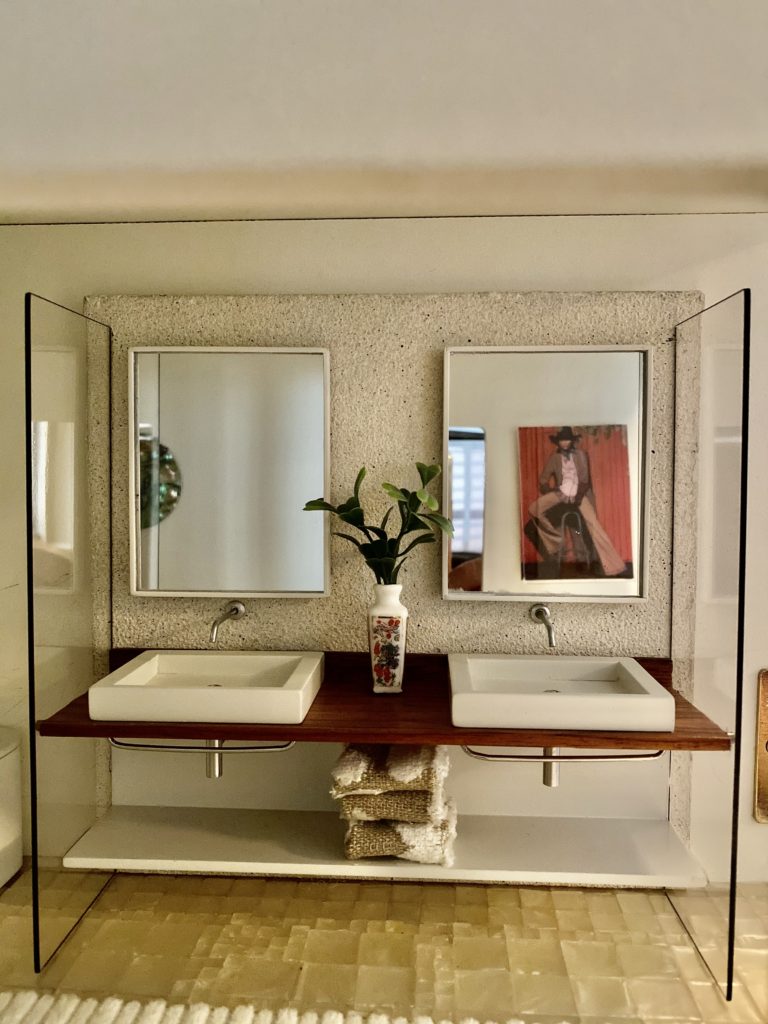
The master bathroom was fun to design. As with other areas of the house, I used pieces of jewelry to create many of the accessories. The abalone piece on the wall is from a necklace. The sconces were jewelry pins.
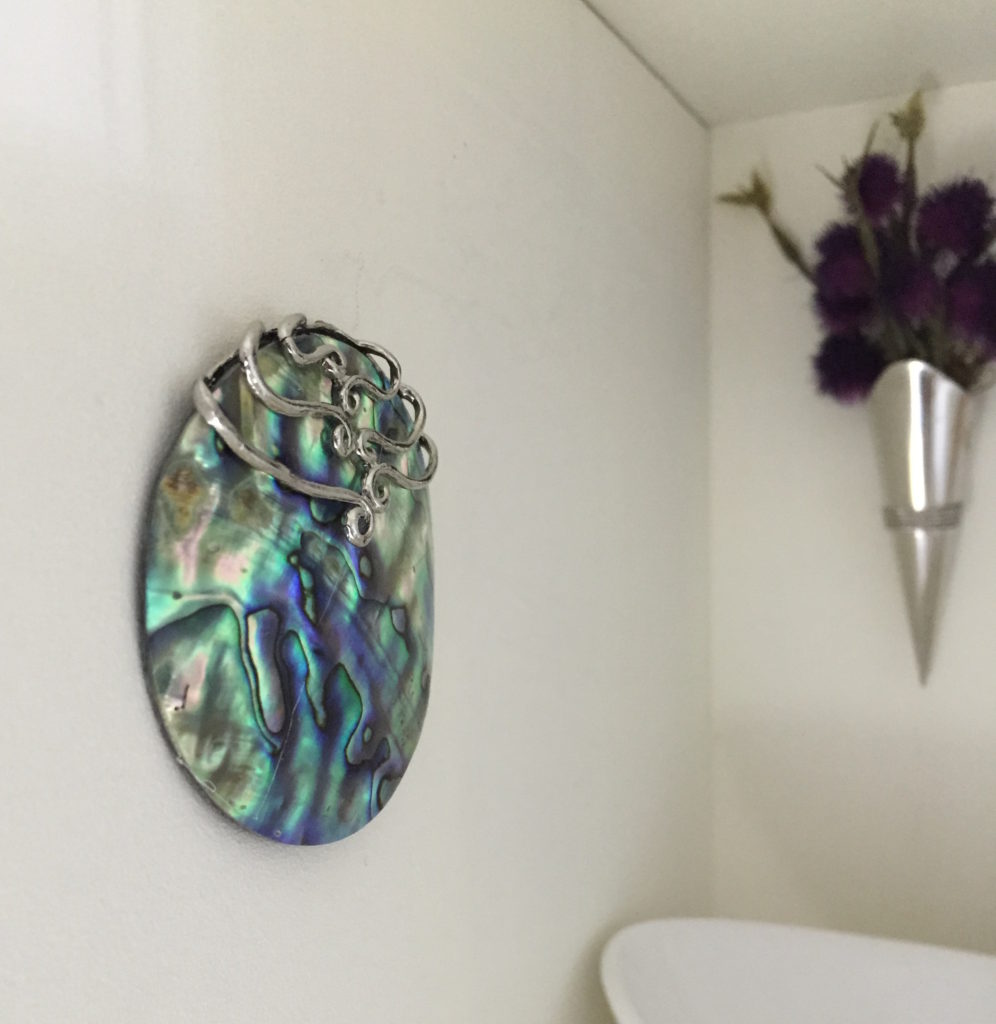
When doing bathroom renovations, I am often asked for a free-standing tub. For that reason, I decided to add it to my mini house, using that particular design shape to help show off the flooring beneath the tub, which was made from a mother of pearl craft sheet. Mini silk flowers inside the pins made the perfect wall sconces, which, along with the “crystal” chandelier, added a sophisticated touch of elegance to the room.
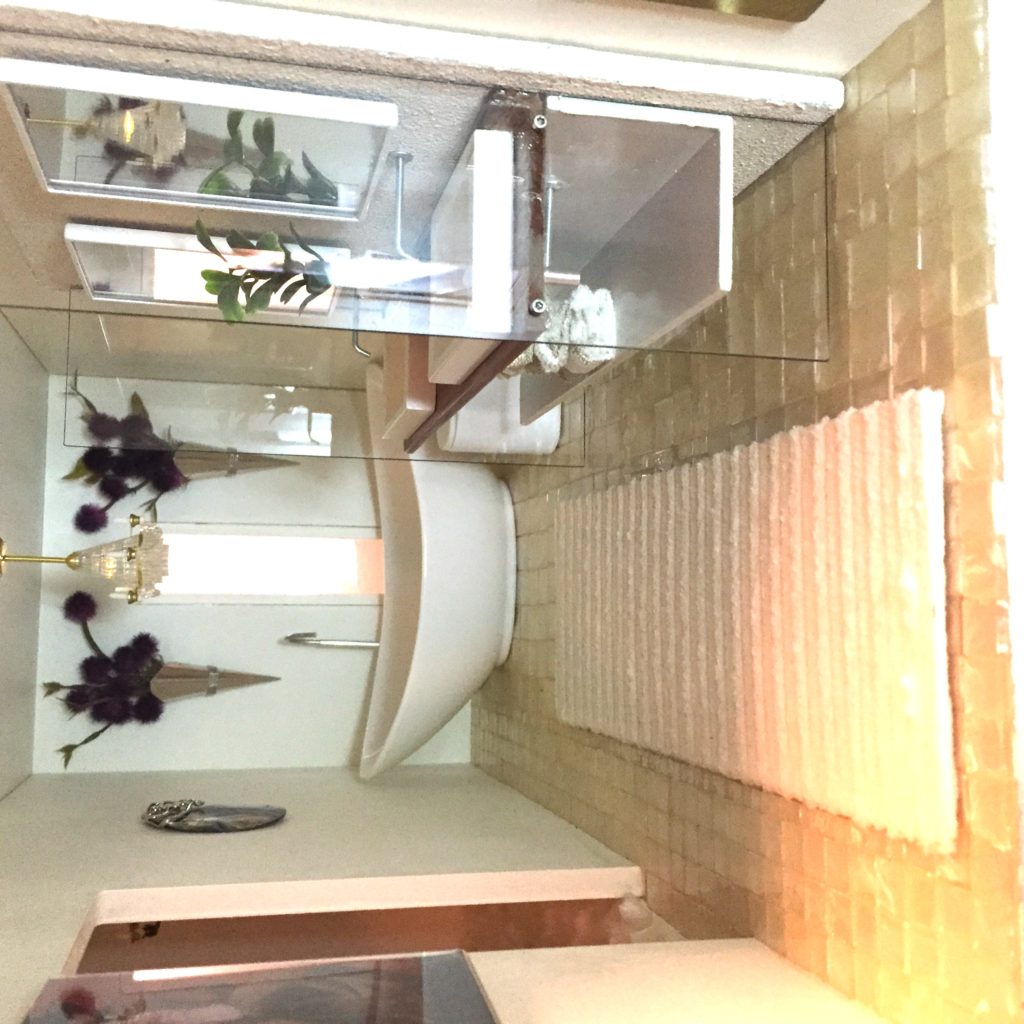
If you have a long, narrow bathroom, it helps to keep the tub colors light and use graceful, clean lines in your design. I opted for the floating sinks in place of the standard vanity to continue showing off the flooring. The towels are from fabric samples.
Kitchen and Dining Room
Heading down one level, we have the kitchen, dining area, and outdoor patio.
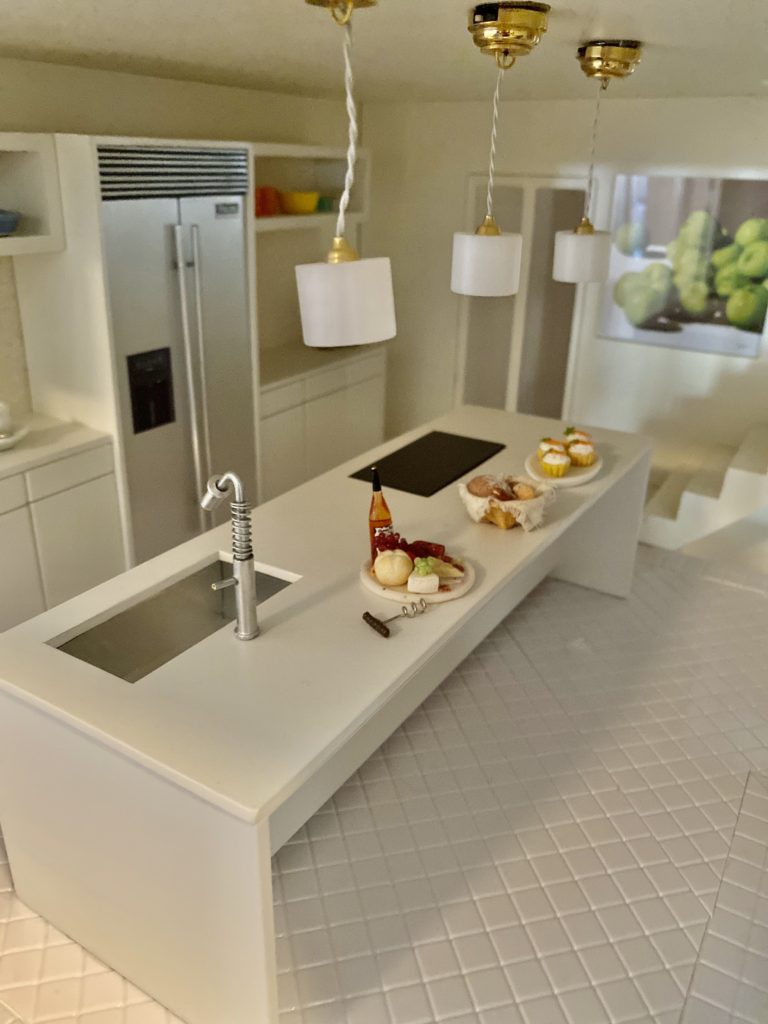
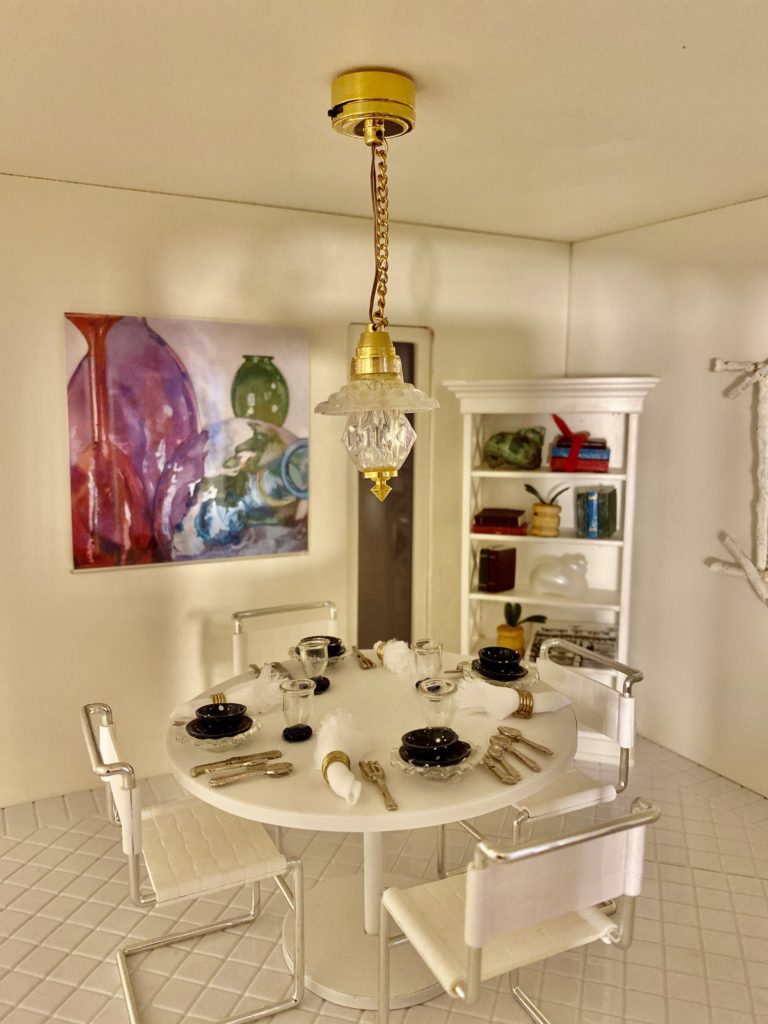
I purchased the kitchen, table and settings, and wall unit in the dining room. Again, I went with a white, modern design throughout these rooms. It was fun making the tiny accessories that adorned the wall unit.
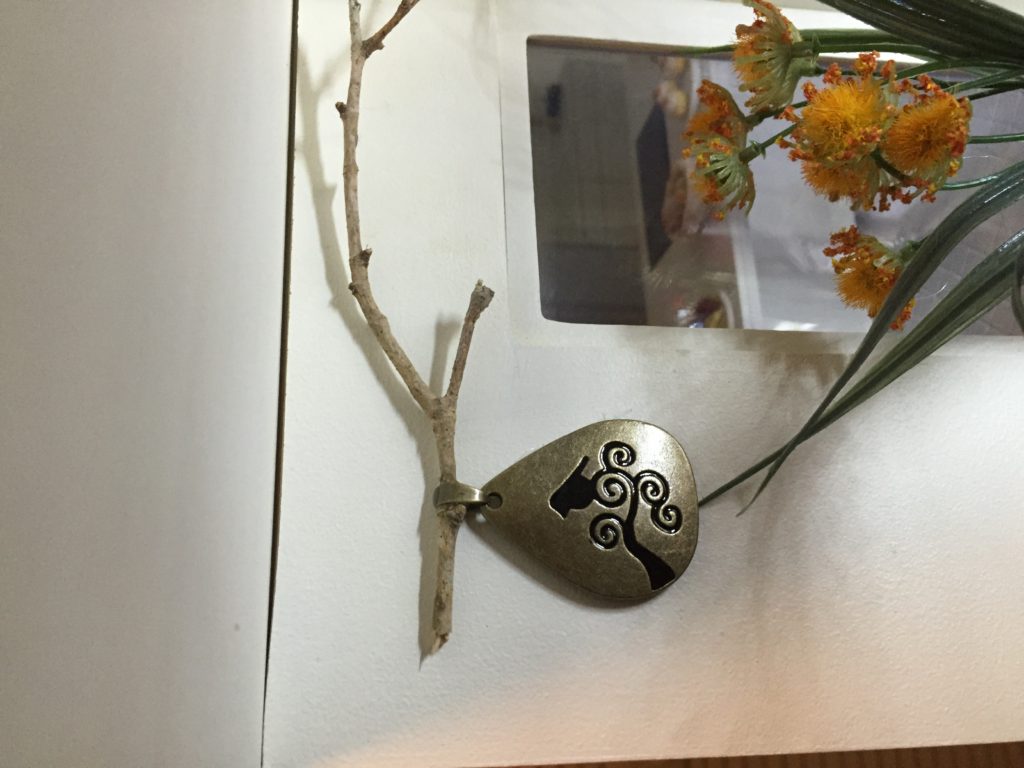
Outside the kitchen is another patio. I used another pendant along with a branch that I found to adorn the wall. The chair is the perfect place to curl up and read a book or search for new recipes.
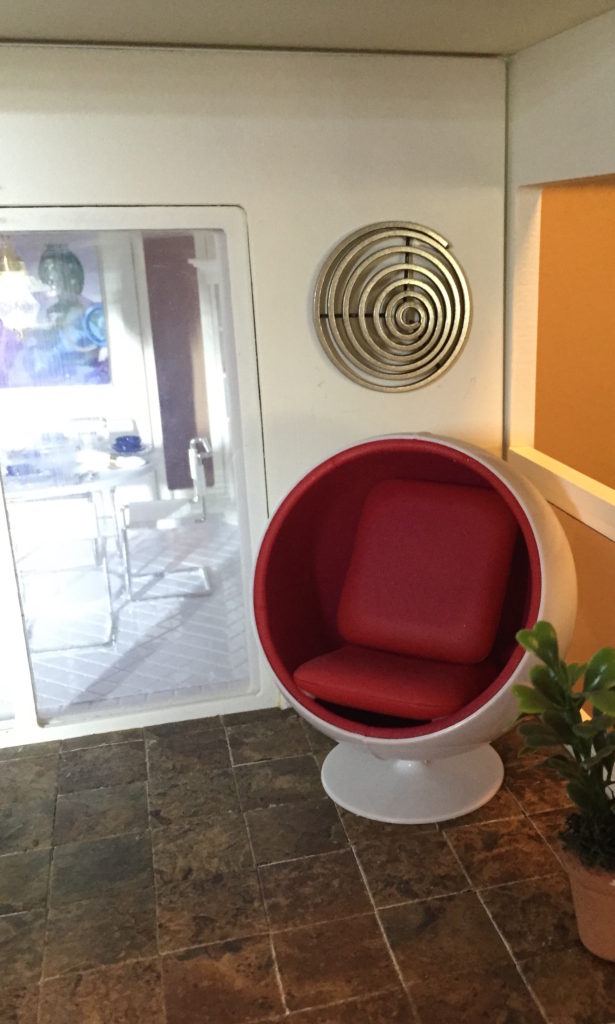

The flooring is plastic sheeting to simulate a tiled floor and the patio uses individual tiles to simulate stone.
Family Room and Formal Living Room
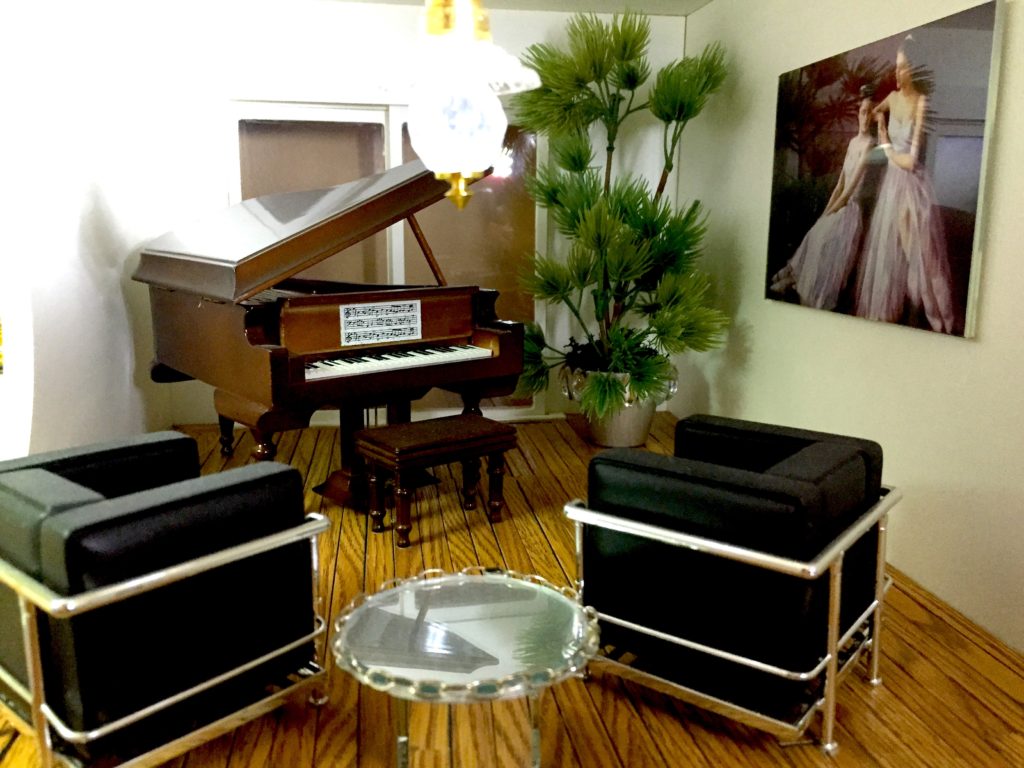
Heading downstairs to the bottom level of the mini house, we have the family room and formal living room (complete with a baby grand piano).
The family room at the base of the stairs features wood plank flooring and a white faux fur shag rug. Although the furniture was purchase, I made the coffee table by gluing different size mirrors together.

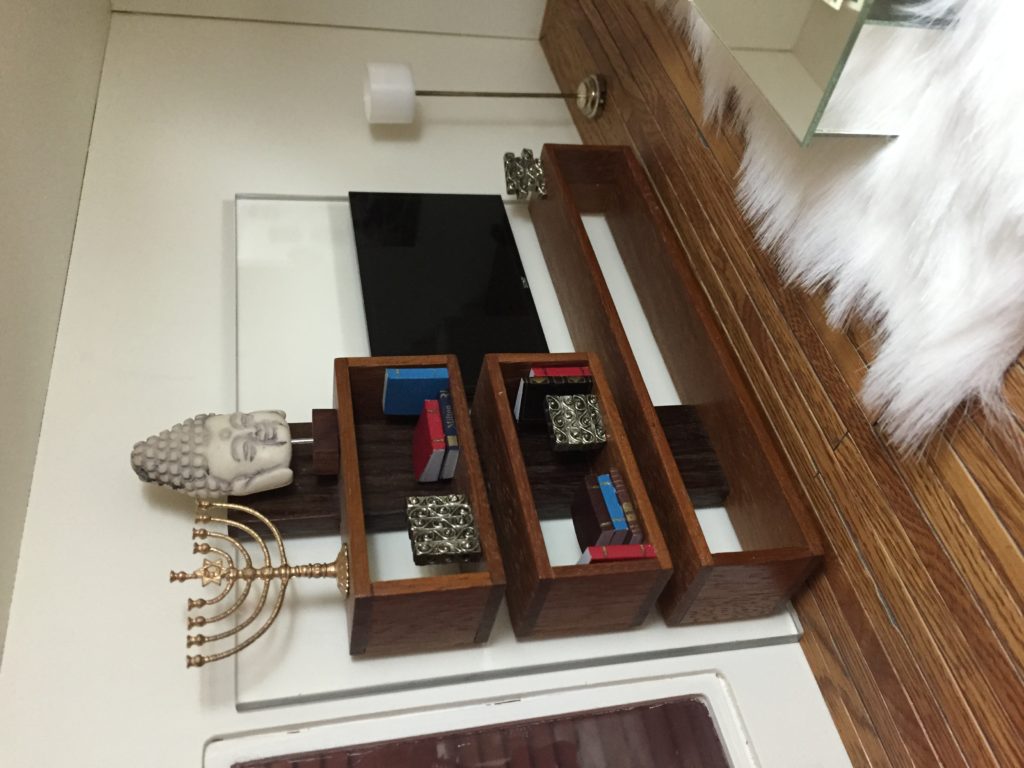
Decorating the wall unit with books and artifacts, including a Chanukiah (menorah) completed the look.
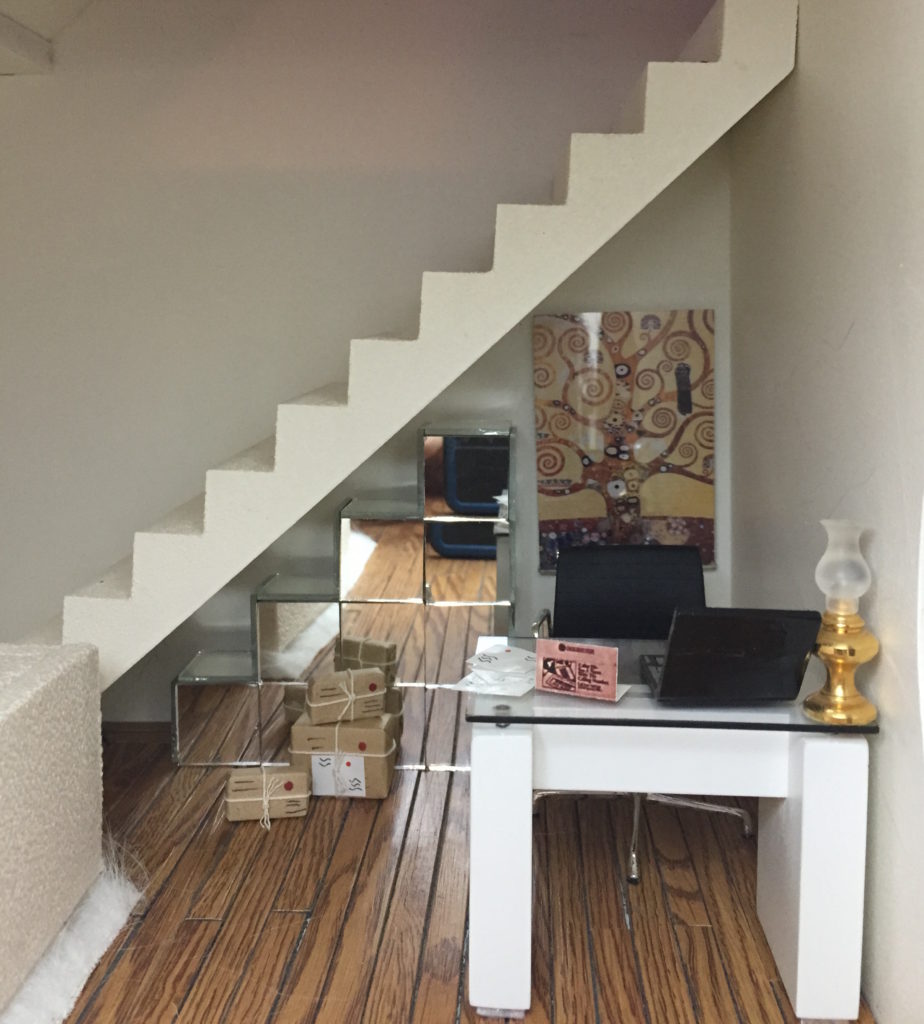
Tucked away under the stairs, behind the family room is an office, complete with desk, computer, and packages ready for shipping (or opening).
A beautiful circular archway leads into the formal living room. I handcrafted the mirror table using some chain I had hanging around my home. You can imagine a family sitting here, listening to a loved one playing songs on the piano.

I enjoyed many treasure hunts to Michael’s and JoAnn Fabrics to find the right craft items for the pieces I wanted to build. I hope you enjoyed my labor of life – you can see the finished project in the photos below.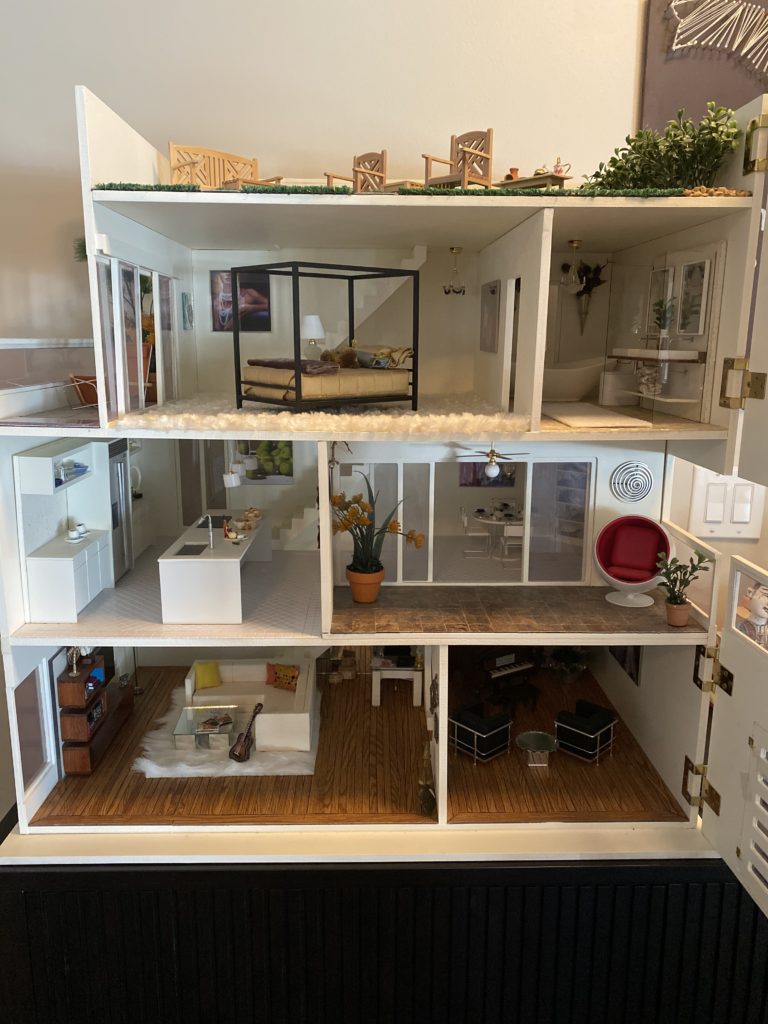
If you ever want to try and build a mini house of your own, check out https://miaimminiatures.com/index.html
Are you ready to take your home to the next level? HK Interiors can help you transform your home or office into the vision you desire. Call 954-401-8542 today for more information.